‘Good setup’ beats ‘high end’ every time

I’ve never been one for high end kit. I’ve never owned a really posh bike in my life. I’ve owned a few decent ones and a lot of entry level bikes. I’ve also ridden a lot of very expensive bikes over the years.

As regular readers of this blog will be aware, my current bicycle of choice is an old ten speed racer, upon which I’ve been having, these past few weeks, a cycling epiphany. Riding my entry level 1987 Peugeot racer has shown me that good bike setup, good maintenance and inherently ‘right’ design is at least as important as ‘high-end’ in terms of that slippery value of ‘performance’.

The great Grant Petersen is right to point out that performance comes essentially from the rider. The notion of a ‘performance bicycle’ is somewhat misleading. No matter what bike you ride, the motive power comes from you, the rider.

Now I’m not saying (and neither is GP) that the bike is not implicated in the whole performance issue. What I am saying is that a strong rider on a humble yet well set-up, well adjusted and lubed bike can be at least as quick or quicker than someone on a high-end bike that’s poorly maintained. ill-fitting or both.

There’s nothing like the feeling of getting on a bike and it just fitting perfectly. And that’s what happened when I climbed aboard the Peugeot for the first time. Top tube reach and handlebar height was perfect (the big 60cm frame would no doubt be regarded as HUGE for a 6ft rider in the eyes of modern bike fitting experts). The old fashioned Solida double cranks had a narrow Q factor, keeping my feet close together and allowing me to maximise the efficiency of my pedalling.  The 73 degree seat and head tube made the bike respond snappily to pedalling and steering input. Put simply, good design costs nothing and pays back massively.

I’ve had a lighter road bike before, made from aluminium and carbon but it didn’t have that elusive ‘rightness’ that this bike has, low end steel and all. The bars weren’t in the right place – I was constantly swapping stems, rotating bars and moving the seat up, down, fore and aft – to no avail. It just wasn’t right.

The other big factor here is the efficiency that comes from a well lubed and adjusted bike. Wheel bearings set just-so, pedals and bottom bracket slick. Chain lightly oiled and silent. Headset smooth, brakes sharp, tyres at the right pressure. Add all of these small percentage gains together and even an old cheap bike can be fast, efficient and fun.

False economy and the broken spoke – a tale

Last summer I wore through my trusty and dependable set of Deore LX/Mavic T224 wheels, handbuilt by a good friend and former bike shop colleague back in 2001. They never went out of true and I never suffered broken spokes, despite a total lack of tweaking and all manner of abuse and overloading.

However, the rims eventually wore through and I replaced them with a cheap set of factory built 36 hole hybrid/touring wheels. On paper they looked OK – machined sidewalls, wear indicators, a nice width, 36 spokes and decent hubs. Nothing fancy but good enough for commuting duties…

Or so I thought until I heard a twang from the rear wheel the other night on my way home from work. A wobble ensued and upon inspection, a spoke had broken at the bend on the non-drive side.

Now a broken spoke is no biggie – easily replaced if you know what you’re doing. But, if you know what you’re doing, you’ll also know that a broken spoke is a portent of nasty things to come. Normally, the sound of one’s first spoke breakage is the beginning of a sad symphony of pinging and twanging, accompanied on percussion by brake-rub and the sounds of a penny-pincher beating his own chest in anger.

I’ve got a new set of wheels lined up – at least in a virtual sense – Spa Cycles of Harrogate have their own master wheelbuilder who can make up a set of quality touring wheels from Rigida or Exal rims on Shimano Deore hubs for around £140 – handbuilt with double butted spokes with plain gauge on the rear drive side – the preferred setup for touring wheels the world over.

I’m going to replace the broken spoke and see how we go, but I’ve got a funny feeling that an internet order at Spa Cycles is on the horizon…

Whether to sit or stand; nine-speed; broken chains…

Let me recount a recent scary moment on the way to work that has given me cause to ponder pedalling technique, mechanical sympathy and the often dubious merits of ‘upgrading’.

Tuesday morning: The bike and I alight from the train in Manchester and I’m looking forward to a nice 15 minute spin from Manchester Victoria into the office in Newton Heath. A fine, dry morning greets me in Manchester and all seems well.

I turn from the station approach onto Corporation St, cross the tram tracks and head out of the city centre towards the road that runs parallel to the River Irk. I approach a set of lights just as they turn to green, so I stand up on the pedals and get up some speed to try and keep pace with the traffic.

Zoom to macro level – unknown to me, one of the hundred or so pins in my nearly new KMC X-9 nine speed chain has been worming its way insignificantly, yet fatefully, out of its corresponding link plate. Dodgy installation (by me), dodgy manufacture? Who knows?. Nano seconds after I stand on the pedals it happens – a noise like I’ve been shot, then I plummet forwards on the bike. Suddenly there’s no resistance to my pedalling power. The bike lunges from side to side as I attempt to regain control. Luckily there’s no one behind and I come to a halt and look down. My chain has disappeared – I look back and 10 yards behind, on the tarmac, there it is, coiled like a metallic serpent.

As fate would have it, two days before I had ‘rationalised’ my toolkit, foolishly removing my little-used chain tool. What motivated me to do this, I cannot say. I mean, you wouldn’t remove the spare wheel from your car just because you don’t use it very often…

So I was left with a 35 minute walk to work (which was not unpleasant) to rue my foolishness, thank my lucky stars that I didn’t fall off when the chain snapped, and ponder the strength of nine speed chains. Having only ever ridden 8 speed (or less) chains prior to a few weeks ago and, having only suffered chain breakage as a result of a dodgy chain tool, I immediately began to appropriate blame on the new nine speed offering. But surely nine speed chains should be hardy enough for pampered machine like Resurrectio. Rob, my friend, colleague, and bicycle guru swears by 8 speed chains, claiming he runs them without glitches on all of his 9 speed equipped bikes. Can a chain that’s only fractionally narrower that an 8 speed be so much more fragile?

Whilst I walked and fumed, I also pondered the words of Sheldon Brown, who, amongst other things, extolled the virtues of pedalling seated as much as possible, using the gears to maintain an easy spinning cadence, to minimise strain on the bike and also help prevent accidents due to chain skipping and breakage. http://www.sheldonbrown.com/standing.html

I got to work in philosophical mood, and before I left at the end of the day, had managed to secure the use of a chain tool (thanks Chester) to fix the bike. I pedalled home, with Sheldon’s words, Kenobi-like, echoing in my mind:

“If you find yourself standing to accelerate, on level ground, it is a sign that your gear is too high or that your saddle is too low.”

I got home and, before I did anything else, I repacked the chaintool in my saddlebag, along with the Leatherman tool and second spare tube…

Beating the No-Bicycling Blues

The sorry lack of posts over the last few days have been due to one inexorable truth – it’s been No-Bicycling Week here at theverydaycyclist HQ. No it’s not some new government initiative – a stinking cold has rendered the bike a sorry spectator instead of principal protagonist in the drama of daily life.

Resurrectio, waiting patiently in the hallway for his master to regain full cycling functionality.

What makes things worse is that last week’s miserable, wet and windy weather has been replaced with still air, clear skies and 17 degree temperatures. The temptation to ride is great, but I know that riding the bicycle today will set my recovery back two days (the stairs in work were a tall order yesterday).

However, I can use this enforced downtime to carry out some essential maintenance. Resurrectio hasn’t had a good wash and relube in a while, and that bar tape could do with a fresh coat of shellac.

Also on the agenda is some more craftsy stuff – I’ve got some leftover cloth tape, that’ll be just enough to wrap the right hand chain-stay to replace the frankly hideous, yet functional, Lizard Skinz neoprene chainstay protector. I’ll wrap and then shellac the chainstay and it’ll end up looking just like the handlebars above.


Are you lookin' at me? Walz, wool and a wary expression.

I may finish it off with some twining (if I can find some decent hemp twine). If I’ve got enough, I’ll also tape, twine and shellac my kickstand so it doesn’t gouge my left hand crank. A little like this.

So, when my body gives me the green light for riding, Resurrectio will be ready (and a little more beautiful). Hopefully, in this way, I can beat the no-bicycling blues.

Also, when I’m recovered, I’ll have my rather excellent tweed Walz cap to enjoy on those wonderful autumnal rides on the bike path.

Right, I’m off – there’s chores to be done.

Another ‘Essential Cycling Toolkit’ Article

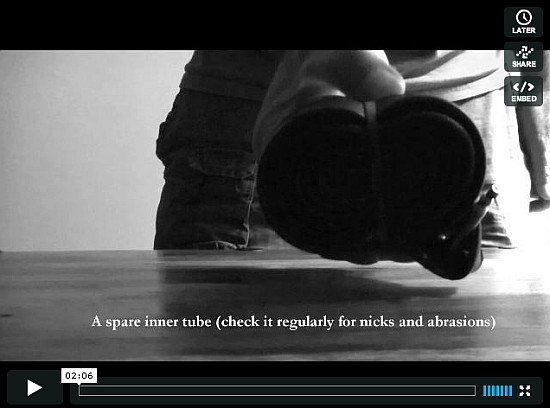
Click the image to play the video (link to Vimeo)

Getting around by bike is all about fresh air, freedom and a feeling of getting from A to B under your own steam. However, the utopian dream of free-spirited, low-impact travel can die a death very quickly when you hear that dreaded hissing sound from your tyres. The sinking feeling of a flat half way from home, half way to work, can be a real pain – unless you come equipped. With this in mind here’s what I carry on my bike at all times – and, without sounding too preachy, it’s what I’d suggest you carry too.

  1. Spare Tube – make sure it’s the right size and check it regularly for air-tightness
  2. Pump – make sure it fits the tubes on your bike
  3. Tyre Levers – Three of them will remove even the most stubborn tyres. Plastic ones are best.
  4. Multitool – with flat-head and cross-head screwdriver plus 2-8mm Allen Keys
  5. Chain tool (if you know how to use it)
  6. Pliers – handy for pulling nails/chunks of glass from tyres plus a whole raft of other uses
  7. Puncture Kit – to be used as a last resort if your inner tube fails
  8. Mobile Phone – the ultimate get you home accessory (store the numbers of a few local taxi firms)
  9. Cash – If all else fails – for taxi fare home.
  10. Pair of latex gloves or a small pack of wipes – to keep your hands clean when doing repairs
  11. Lock – even if you don’t plan to leave the bike

All of this (with the possible exception of the lock) will fit in a small bag which should be permanently attached to the bike, so you never leave home without it. Everyone has their own variation on this ‘essential’ list so feel free to chime in with your suggestions, or to point out any frightful omissions!

Happy cycling!

Hail to the LX Hub

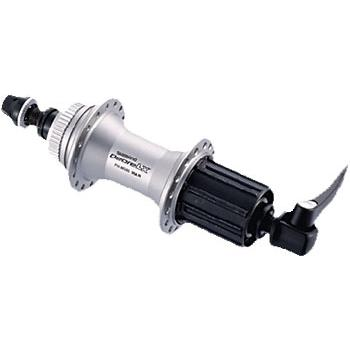
After nine years, thousands of miles and absolutely zero maintenance, I finally got around to servicing the Deore LX rear hub on my all-rounder bike. Over the past few weeks I’d noticed a little play in the rear wheel and figured that the bearings had started to wear and/or the last of the grease had finally wormed its way out, after the hardest winter that the bike had faced.

Shimano Deore LX rear hub

I set at the hub, first removing the cassette, before going at it with the cone spanners. A brief yet concerted flurry of spanner wielding and cleaning with a rag revealed absolutely no wear whatsoever – to the bearings, cones or races – just a light track on the cone where the bearings made contact. The play in the rear wheel was traced to a driveside locknut working loose.

It’s easy to take Shimano’s engineering excellence for granted, especially that of their less showy, less feature packed components. However, the bag-per-buck factor of the LX hub cannot be ignored. The longevity of this component – due to ultra-tight manufacturing tolerances and superb labyrinth sealing, is really impressive.

So I reassembled with fresh automotive grease, re-using the original, perfect bearings, adjusted the cones and tightened everything down. The result – one silky smooth rear hub, no play, no grinding, no doubt ready for another nine years of almost daily riding.

Within the Shimano component hierarchy, LX is right at the price/durability sweet spot. For daily use on a fine bike, there’s no reason to pay more.

Primal Blueprint – 5 and a bit week Update

13st 1.2lbs on the scales this morning. The weight is still coming off slowly but surely. 
The further away I get from my old carb laced diet the happier my body seems to be. Its getting to the point where I’m so satisfied with my food intake that it’s hard to eat over 1800 calories a day without really trying or really feeling bloated. I’m trying to push it up to around 2000 calories per day, which will still leave me around 900 calories in defecit even on a really sedentary day. 
My body fat is down to just over 20 percent now, which is great. I’ve been upping my bike riding and walking, plus doing Tabata sets and free weights every other day. 

Above: Primal gearing for a Primal Blueprint kinda ride? The country bike in singlespeed mode.  
I’m also going to convert my green country bike back to singlespeed (how it started life) to give my ride some ‘muscle confusion’ as Mark Sisson would put it. 
You see, cycling seated at a constant cadence isn’t a very good primal exercise – Grok didn’t do turbo sessions. He sprinted, climbed, stooped, lunged, lifted and stretched. 
I think that a one speed bike will encourage me to use more of my body when climbing or muscling the bike through mud and rooty sections. Plus it will give me natural variations in cadence, torque and so on. Sometimes I’ll have to get off and push/carry – i.e. more variation – more primal. 
Plus I get some valuable shed time… Always thinkin…

Dahon D7 – Stem Mod


I’ve modified my Dahon D7 handlepost to accept a standard ahead stem, as detailed in a previous post. ‘Modified’ is probably a bit of a stretch – ‘sawn the top off’ is probably a little more accurate.

Last night I picked up a 100mm 10 degree rise four bolt MTB stem from Bikehut (rebadged Tioga) and scurried home, where, while dinner was cooking (primal diet compatible of course – mackerel with broccoli and peas…) I added the stem to the existing post and with some trepidation, trialled the new cockpit arrangement in the street.

It was a total revelation… The D7 now steers like a normal bike, it’s no longer nervous and demanding of constant attention to keep things in a straight line. Also, for the first time, the bike now fits me properly. Indeed, I’ve got enough reach to move the seat to the middle of the rails. The fit is very like the fit on by road bike and MTB.

I also trialled the other important thing – how the bike would fold. It’s inevitable that the new bar arrangement was going to mean a change in the folded size and the folding process, which now goes as follows: 

  1. Drop the saddle
  2. Fold the bike in half
  3. Undo the bottom handle-post latch and lower the post onto the saddle
  4. Undo the top quick-release on the handlepost and remove the handlebar/stem/telescopic bit
  5. Place the handlebar assembly between the two folded halves of the frame (I’ve found that I can pop the luggage elastic from the rack over it to keep it in place)

The fold isn’t as neat and tidy but it actually takes less time to fold and unfold, because there’s less time faffing getting the bars flipped upwards and the stem in the right place for folding. Of course it’s a little bigger folded than before, but it still fits in the end of carriage luggage racks, which is all that matters to me.

This morning I decided to seal the deal and hacksaw the hinge unit from the top of the post. It was a scary moment taking the hacksaw to the top of the handlepost to remove the hinged stem and leave basically a 1 1/8” aluminium tube, to which I reattached the stem.

Riding it to work and back today was, again, a breath of fresh air. Now the bike fits properly, I can climb out of the saddle and use a lot more upper body when I’m riding. The front end is stable, with much better weight distribution and if I closed my eyes (which I never recommend when riding!) it would feel like riding a full sized bike.

All I need to do to complete the job is get a star nut and top cap – not that it actually needs one from a functional point of view, but it will tidy up the exposed end of the handlepost. ***I’ve since used a tongue-in-cheek solution to the problem – a wine cork 😉***

Anyone else out there done this mod on a Dahon or other folder (I know the SP Brompton uses a similar setup and Bike Friday Tikits are set up like this)

Dahon D7 Hinge – The State of Play

On a slightly worrying note, I’m detecting a little play in the main hinge of my Dahon Speed D7. It’s only noticeable when you rock the bike back and forth with the front brake applied, as if you were checking for headset play. Indeed, I mistook it for headset play initially, before tracing the play on the vertical plane of the hinge. It doesn’t affect the ride at all and is totally stiff laterally and is probably down to a little wear in the bushing, pin or other part of the hinge assembly. The hinge is adjusted correctly so some wear in the hinge-pin itself is all I can attribute it to. I imagine it’s pretty inevitable to get slight play in a highly stressed joint like this. I’ve ridden a few Bromptons that have had just as much play in their rear triangle bushings, straight out of the box, so it’s probably just something that one has to live with on a folder. Weird thing is the play seems to come and go. We’ll see how things develop… 

Has anyone else out there experienced play in the main hinge of their Dahon Speed D7?

Lazy Man’s Pedal Servicing

I used to be a bike maintenance zealot. But what with an increasingly busy working and home life, golden time for tinkering has become harder and harder to find. So what do you get? You get smart, that’s what. 

Take pedals for instance. My favourite set of pedals are a pair of VP BMX style platform pedals (a bit like the Shimano DX pedals of yore). I’ve had a set for about 3 years now and they’ve been used and abused on the MTB and the commuter – suffered jetwashing, crashes and day to day use in disgusting weather. As a result they’ve become a little rattly and unhappy – until today. 
Inspired by this article on Bike Radar I decided to get busy with the 5mm drill bit and inject some greasy new life into my pedals. However the Bike Radar article requires you have a proper grease gun. However I found that a disposible oral syringe did the trick. I drilled a 5mm hole in the plastic end cap of the pedal and syringed large amounts of grease into the pedal until it blew it’s end cap off. I pushed the end cap back snug and voila – smooth pedals and probably an extra year of happy pedalling. 
As you may have guessed by now I’m allergic to spending money when I don’t have to!